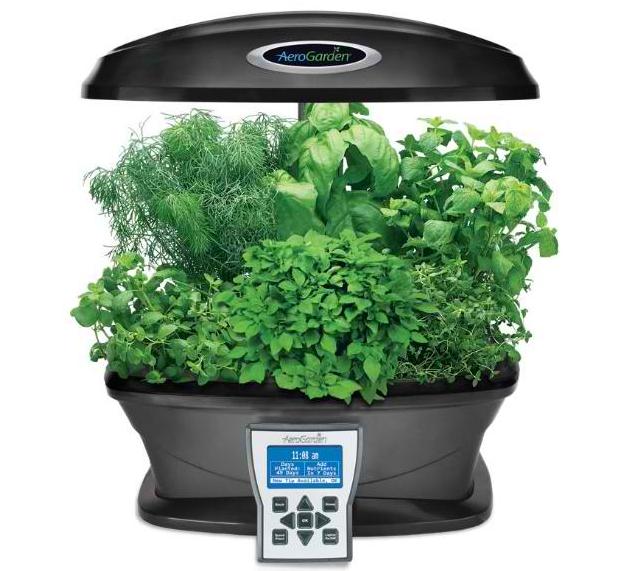
 An indoor garden kit is a self-contained, compact, and portable planter that allows the growth of plants, herbs, and vegetables without natural sunlight and soil. It is usually comprised of a receptacle that holds water and fertilizer, a hood/dome equipped with grow lights, an adjustable lamp arm, and a control panel that can be set to automatically adjust lighting and other functions or tell it is time to water or add nutrients.
The kit usually comes with seeds that are placed into accompanying pods and inserted into the receptacle. A pump provides water and nourishment to the roots of the plants. An electric plug supplies the power that runs the lights and pumps.
The indoor garden kit allows individuals to grow and enjoy their favorite ornamentals, herbs, and vegetables during winter or if they do not have outdoor space or have limited access to sunlight. The kit comes in various sizes but is usually small enough to fit in a kitchen counter or a small terrace.
It is usually designed to disassemble into a compact unit when not in use, making it easy to store or transport. When shipping, the kit must be properly packed to avoid any damage during transit. Here are tips on how to properly pack and ship an indoor garden kit.
Unplug the kit and roll the cord into a neat coil fastened with a twist tie. Remove any plant from the pods. Also, get rid of the water in the receptacle and dry it clean to prevent leaks during transit. Remove the light bulbs from the hood and wrap them individually in several layers of bubble wrap. Do the same with other parts that were removed from the unit (lamp arm, seed pods, etc.) and arrange them neatly inside the receptacle. Fill any remaining space with more bubble wrap or bagged packing peanuts so that the items cannot move. Place the hood on top of the receptacle like a lid.
Wrap the entire kit in several layers of bubble wrap and secure it with tape. Place the item inside a sturdy shipping box with a layer of packing peanuts on the bottom. Fill empty spaces on the sides and top with more fillers to prevent movement. Close the box and seal with packaging tape. Make sure that all seams are reinforced with tape and will not burst open during transit.
Address and label the box and take to the post office or shipping company.