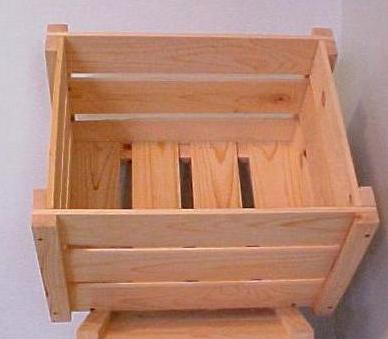
 Sometimes, cardboard shipping boxes are not enough to provide sufficient protection for your shipment. Fragile items such as antique furniture, bulky home appliances and motorcycles require that they be placed in wooden crates to ensure that they are safe and protected from harsh handling during transit. Crates and palettes are readily available in shipping supplies stores but if you want a snug fit, you can custom build your own crate. Here are some tips on how to build your own Do-It-Yourself wood crates for shipping.
Prepare all the necessary tools and materials. For this project, you will need one 48-pack of 16″ shims, one 10-foot-long 1×2 board, 12 oz. of ¾” nails, one can of black spray paint, stencils, a saw and a hammer. This project will yield a 13″ x 12″ x 8″ crate. Make the necessary adjustments to fit your requirements.
Make the frame of the crate by cutting to size the 1×2 board. You will need four 13″-long pieces, four 8″-long pieces, and four 12″-long pieces.
Lay two of the 13″ pieces and two of the 8″ pieces on a flat surface to make a rectangle. Place the shims in a vertical position on top of the frame until the frame is completely covered (you will use approximately 10 of the shims. If they don’t fit perfectly, cut the shims down so they end up being flush with the frames).
Nail the shims into the frames. Be careful not to split the wood while nailing them together. Do the same procedure to make another frame for the other side.
Next you will build the other two sides. Lay the 12″ pieces of down and place approximately six shims in a horizontal manner so that the ends of the shims are one inch past the edge of the 1×2. This will create the other two sides while leaving enough room to hammer the sides together.
Assemble all the sides together. Hammer the horizontal shims into the frame for the vertical shims. This will create the sides of the box. Place the box so that it is open on both ends. Starting from one side, hammer shims into the vertical frame on both sides. This should take about eight shims.
Flip the box over and place the item you are shipping inside. Make sure that the item is wrapped in protective material such as bubble wrap and all empty spaces are filled with packing materials to prevent movement.
Once the item sits snugly in the box, close it by hammering the rest of the shims into the vertical frame to create a lid.
Use spray paint and stencil with “Fragile” sign and arrows pointing which way is up. Address the crate and ship it out.
